Laundry Room Decor Ideas – Part 2
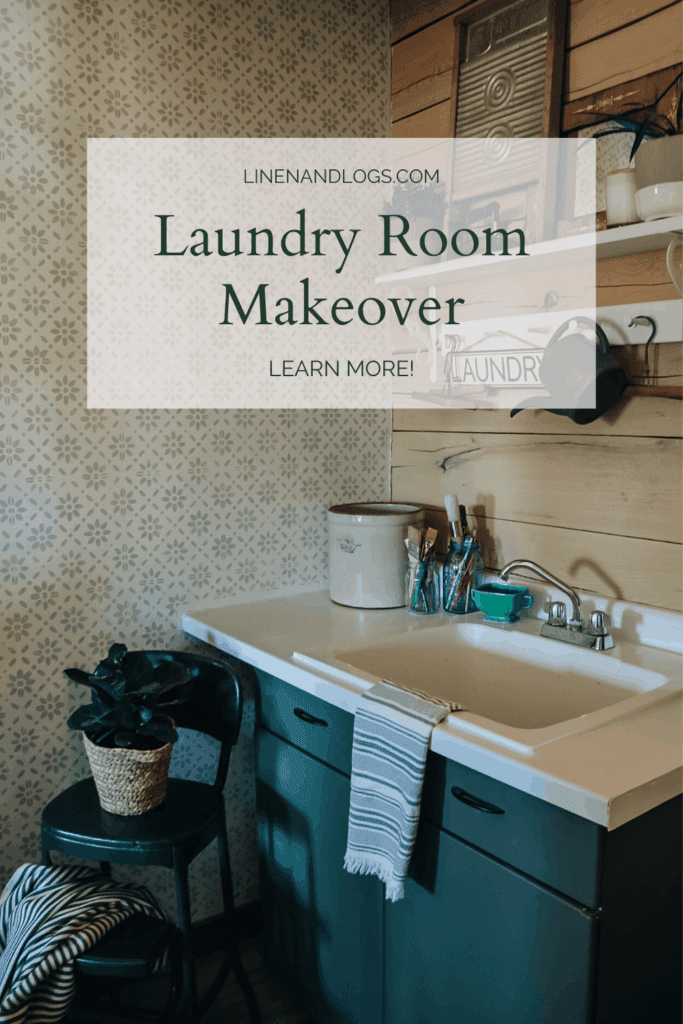
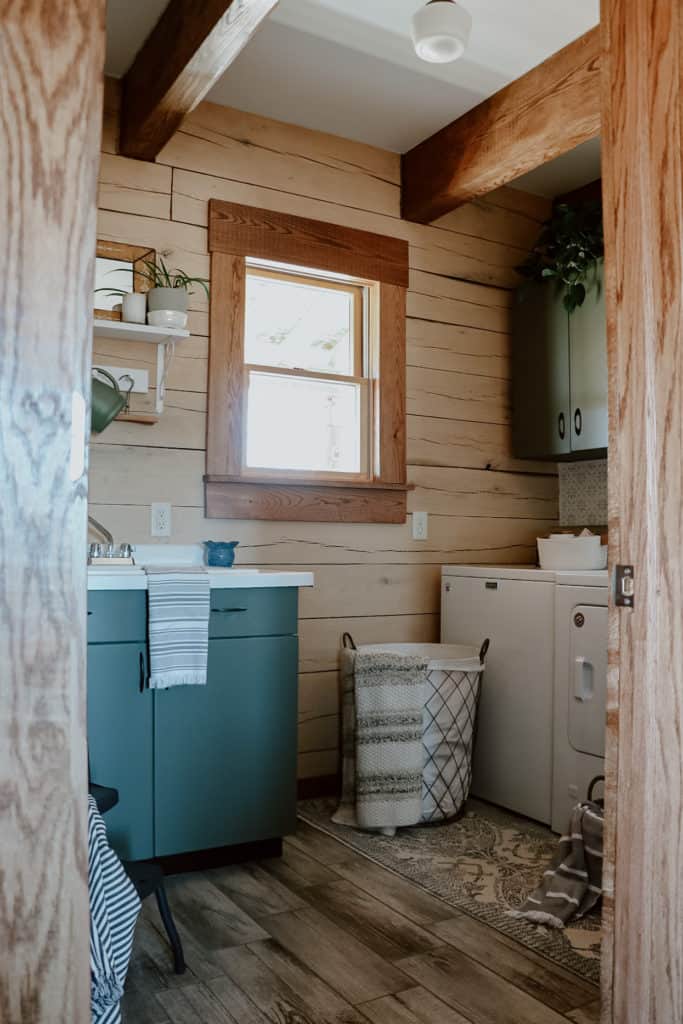
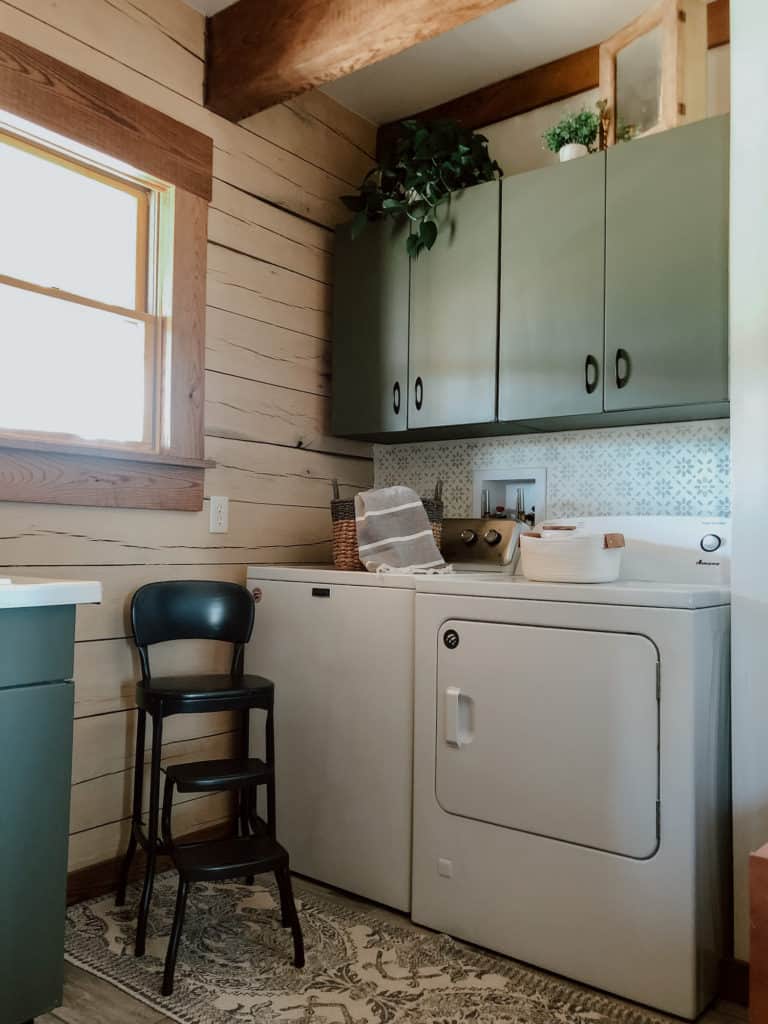
The never-ending saga of the Laundry Room Refresh! This room took much longer to do a refresh than I anticipated. But I think I say that every time. In the Laundry Room Refresh Part 1 blog post, I shared painting the laundry room cabinets, stenciling the wall, and painting the handles and other odds and ends. In this second part, I will be sharing laundry room decor ideas including painting decor, making the shelf, and a few goodies that I have been waiting to use in the Laundry Room!
I may get a commission for qualifying purchases. You can see my full disclaimer for more details.
Painting the Step Stool
I found this step stool on Facebook Marketplace many years ago. And honestly, I don’t even remember how much I paid, it could have been around $10. It has a ripped seat cover, and paint splatters all over, but has been perfect for using as a step stool. After much debate, I decided to paint the stool in Fusion Mineral Paint using Black Coal + a drop of Casement. The mixing of the two colors lightened the black to a dark grey.
- Clean stool with Liquid TSP + Water
- Allowing time to dry
- Paint first coat of paint and allow to dry
- Paint a second coat of paint
- Allow the paint to fully dry overnight
- Apply a thin coat of Polycrylic to the chair and allow to dry
- Apply a second coat of Polycrylic
- Allow the sealant time to dry and cure for a couple of days before using
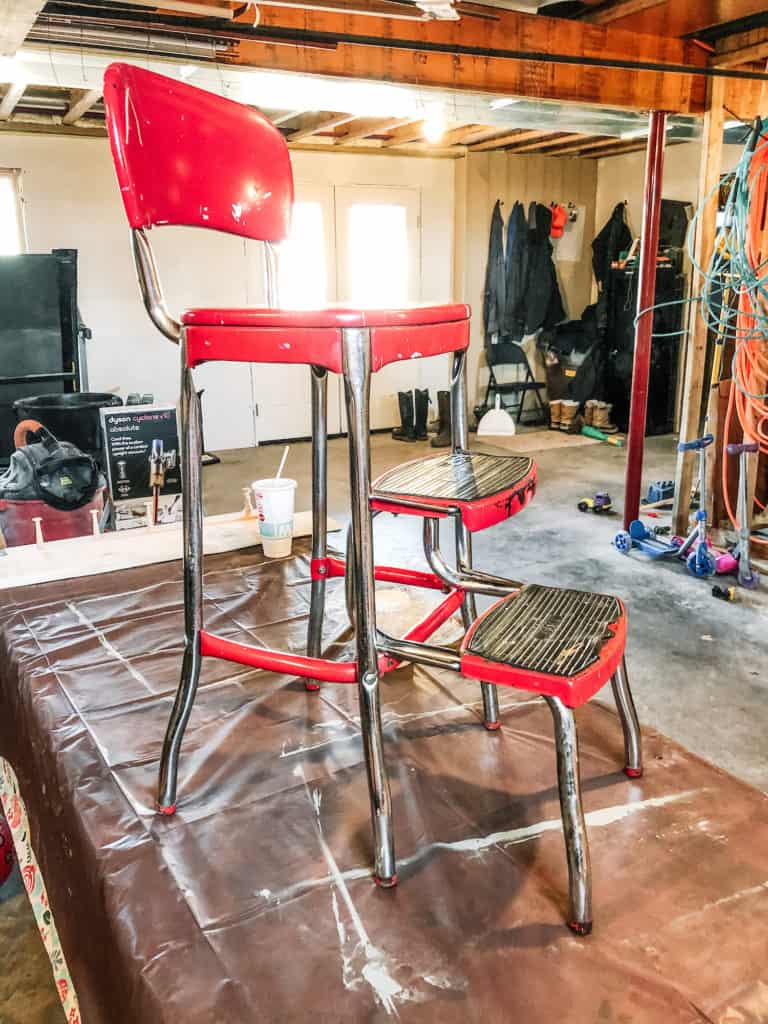
After painting the step stool, the transformation was amazing! Some day I may recover the seat and back portions, but for now, this was a very budget-friendly option to give it an updated look.
Do you want to get the same look?
You can click on the picture if you see something you are interested in.
[show_shopthepost_widget id=”4063462″]Laundry Room Shelf and Hooks
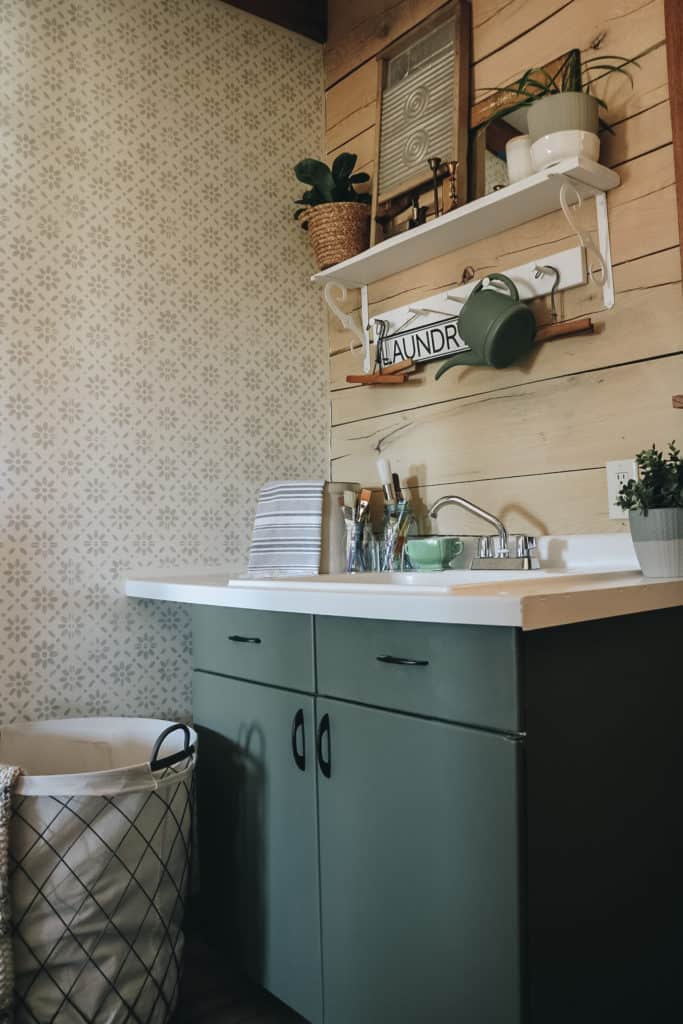
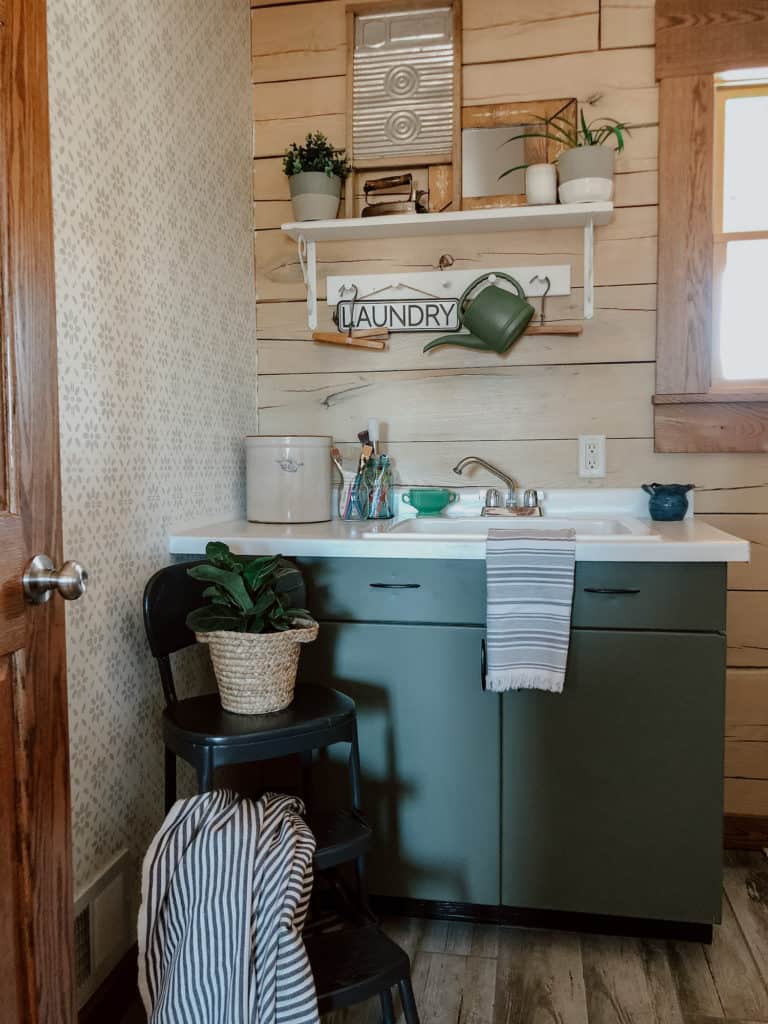
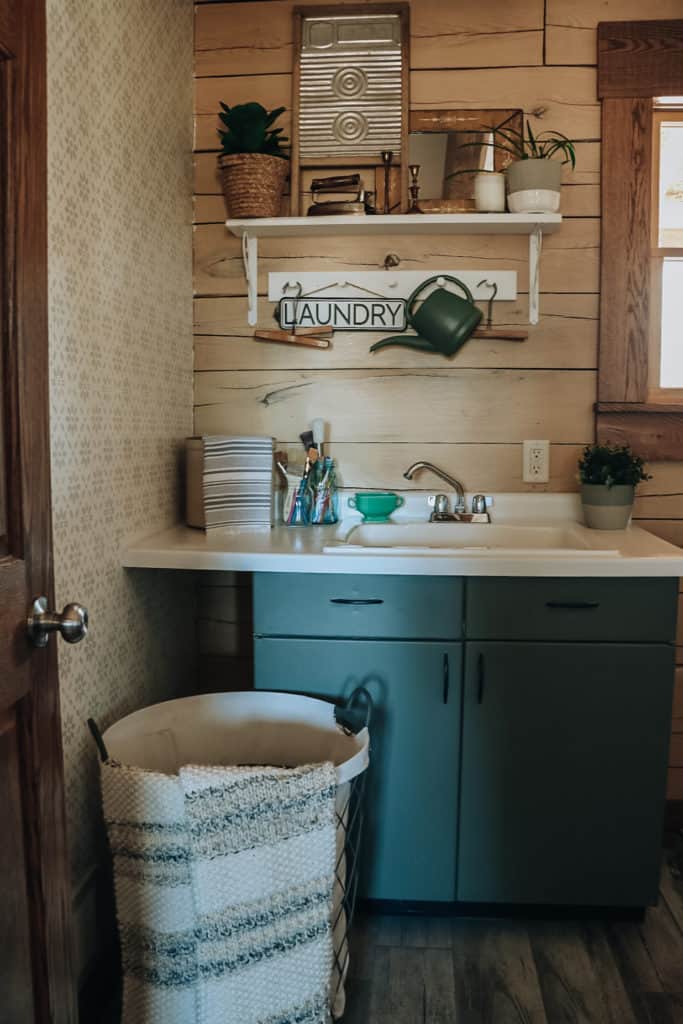
The laundry room shelves were one piece of the laundry room refresh that I had a true idea of what was going to do. I knew I wanted a wooden peg hook rack with a shelf on top. Using supplies on hand for the shelving unit, and a quick run to our local Walmart to grab a wooden peg hook and I was ready to go! Supplies used XX inch long piece of wood, two brackets, peg hooks, and screws for hanging on the wall.
- Sand wood with sandpaper grit 80 and 120
- Prime wood, peg hooks, and brackets – allow time to dry
- Paint with desired paint – I used Fusion Mineral Paint in the color Casement
- Paint a second coat and allow to dry
- If desired, you can put a thin coat of sealant like Polycrylic. I choose not to for this particular project.
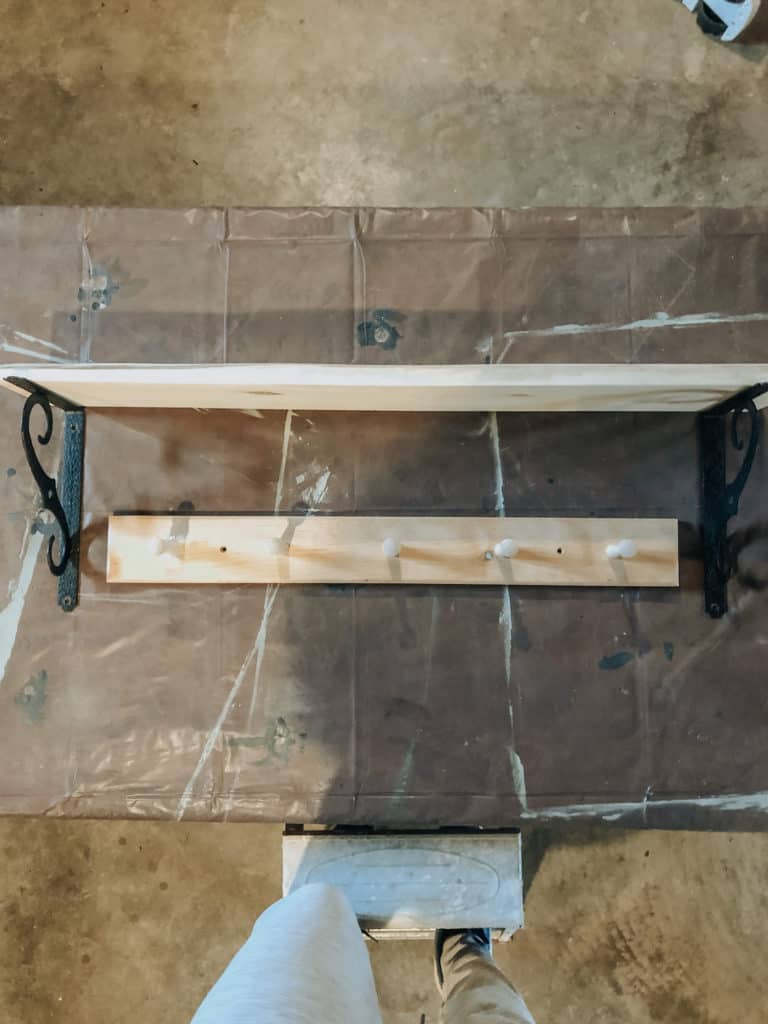
After the paint dried, the brackets were attached to the wood, making sure to center on the board. I also ensured that the peg hooks would fit between the brackets and looking as it was made to fit there.
Are you looking for something similar?
Here are a few options that I found for you!
[show_shopthepost_widget id=”4063469″]Laundry Room Countertop
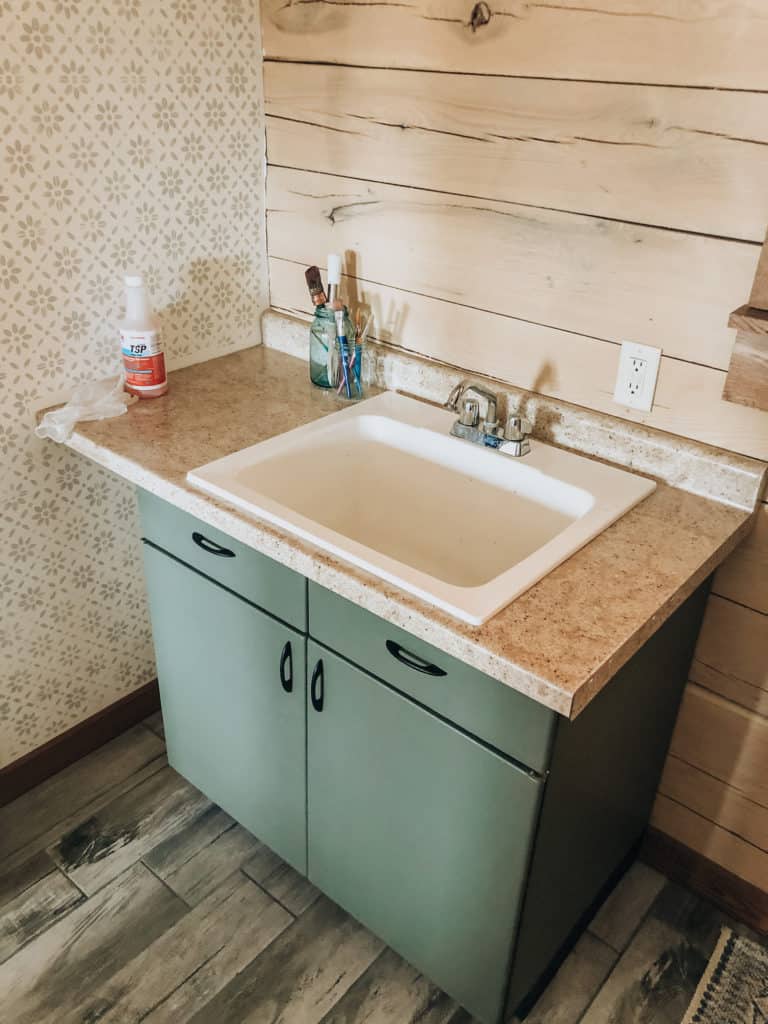
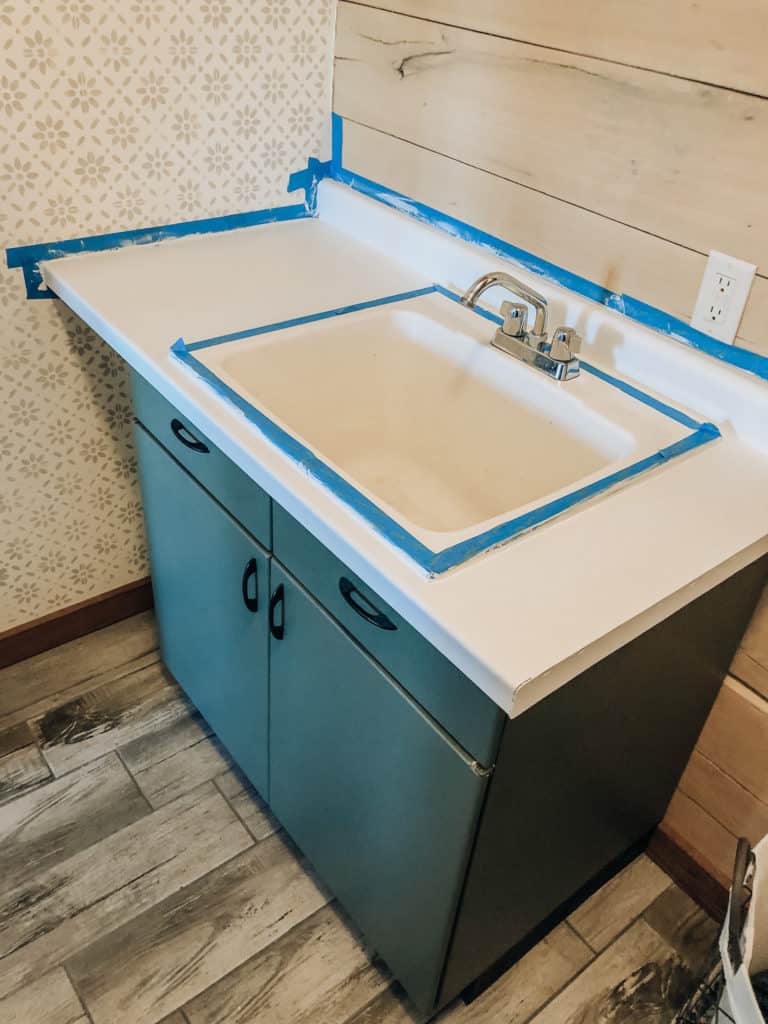
The countertop… I should have left well enough alone, and not touched the countertop. But, I didn’t love how the yellowy countertop blended into the wall. So I decided to paint it! If it didn’t turn out, then it wasn’t a huge deal and we could replace it in the future (to be honest, a long time in the future). So I will review what steps I took to paint the countertop, but I will also share what I would have done differently.
Countertop Painting Process
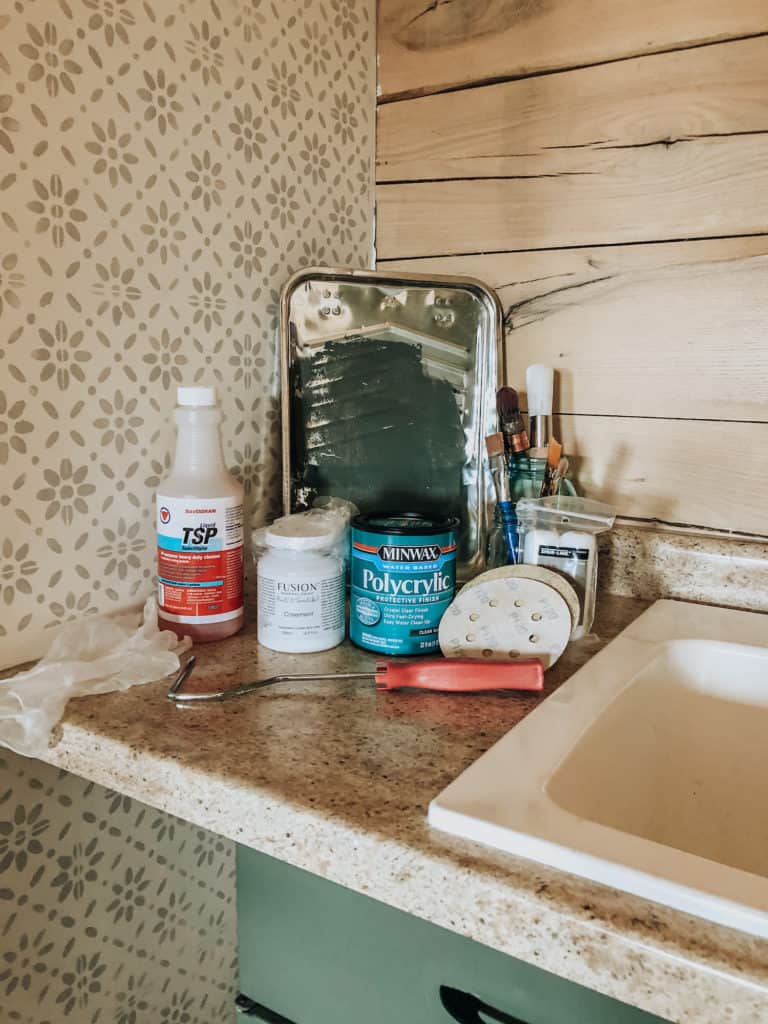
- Remove any caulking on side of countertop and around the sink
- Lightly scuff countertop with 120 grit sandpaper to allow the paint to adhere properly
- Clean with a mixture of liquid TSP and warm water
- Tape off the wall and around the sink
- Prime the countertop with primer (I used Kilz2 Primer) – 2 coats with a paintbrush
- 2 coats of paint (Fusion Mineral Paint – Casement) with a foam roller
- The third coat of paint was applied with a paintbrush
- 2 coats of sealant were applied with a paintbrush
- Removed tape
- A bead of white caulk was done at the wall and around the sink
What I would have done differently
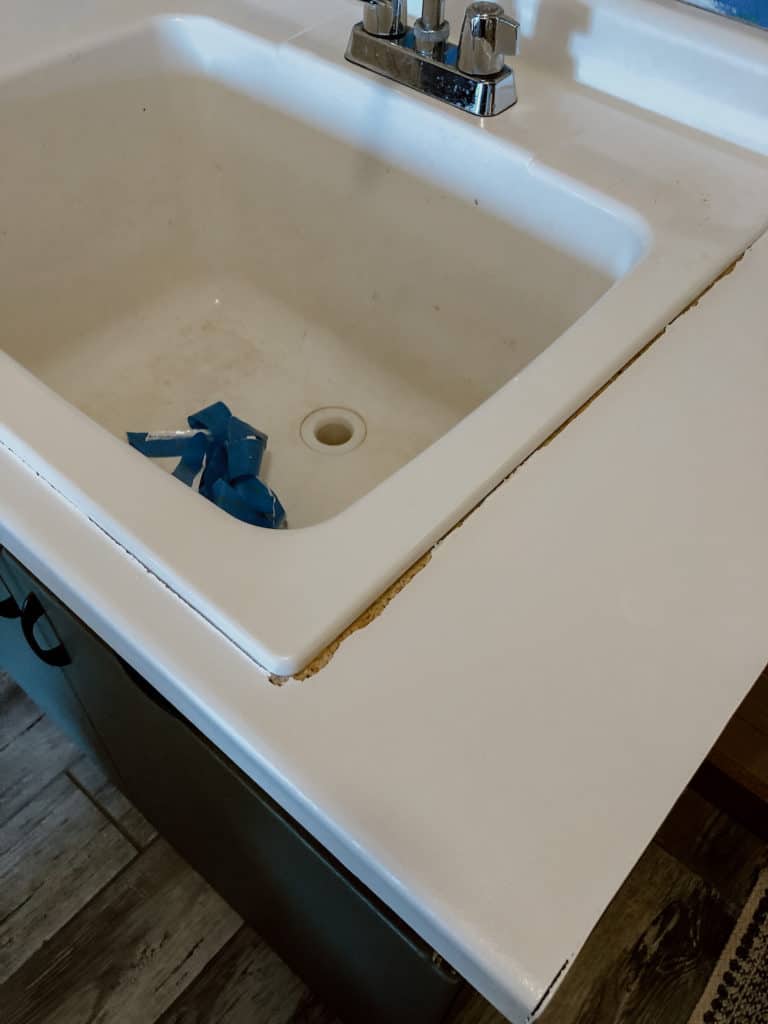
Alright, issues that came up. First, I should have made sure I removed all of the caulk at the beginning. Paint does not adhere to the caulk and this caused an issue. Secondly, I would not have taped around the sink and at the wall. I would have used a small paintbrush in these areas and a freehanded painting. This is just my preference.
When I removed the painter’s tape, I peeled up the paint and primer around the entire sink. And when I tried to repaint these areas, the paint did not adhere because of the caulk that was not removed. I was able to remedy this by putting a bead of white caulk to cover it up, but not an ideal solution in my book.
And now, after having a plain, white countertop in the laundry room this DIY was not the greatest idea. There are water spots from the laundry sink and it stains easily.
Like I said, in hindsight, I should have left the countertop alone, and we could have replaced it at some point for a color that better suited the laundry room.
Laundry Room Decor Ideas
Now comes the fun part of the laundry room refresh. Decorating the laundry room! Using only the decor that I had, I was able to dress up the laundry room. I have had a few pieces that I have been waiting to use in my laundry room! These included a vintage washboard and iron that I have held onto for years. I added a mirror, which helps reflect light in the otherwise darker space, and plants. I also like to mix faux and real plants to give different varieties. After adding a few more space fillers like candlesticks and candles, I found some vintage hangers that I added to the hooks. And because the watering can never seem to have a home, it ended up on the hooks also! And is also acts as functional decor.
SHOP THE POST
[show_shopthepost_widget id=”4066753″]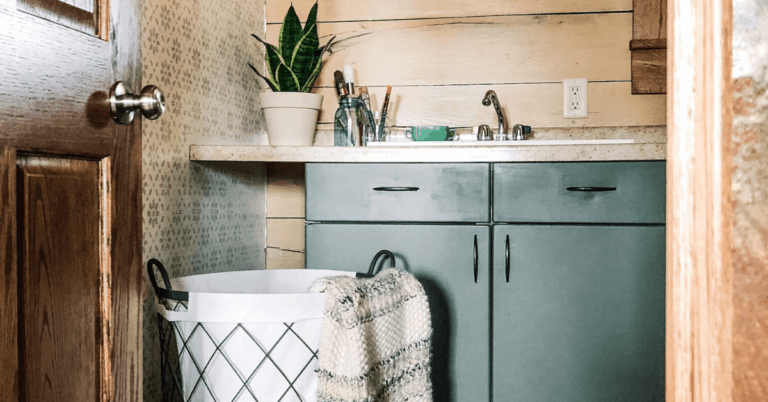


This turned out so nice. I hate taping stuff off & trying to remove painters tape, too. I always score it with an x-acto knife and remove while paint is still wet, but this is hard to do when painting layers. Good thing you can still easily and not at a huge expense replace that sink if it’s bugging you!
Thank you for that tip! I will have to remember that next time I need to tape!