How to DIY your Kitchen Island
DIY Kitchen Island. Your kitchen island can either make or break the functionality of the kitchen. That being said, it can also be as expensive or as budget-friendly as you can make it. Use this tutorial to DIY a kitchen island and give it a makeover!
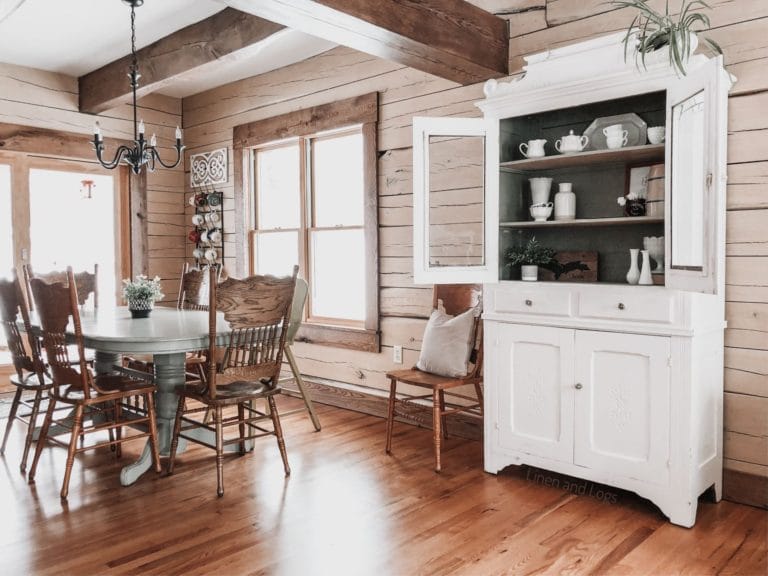
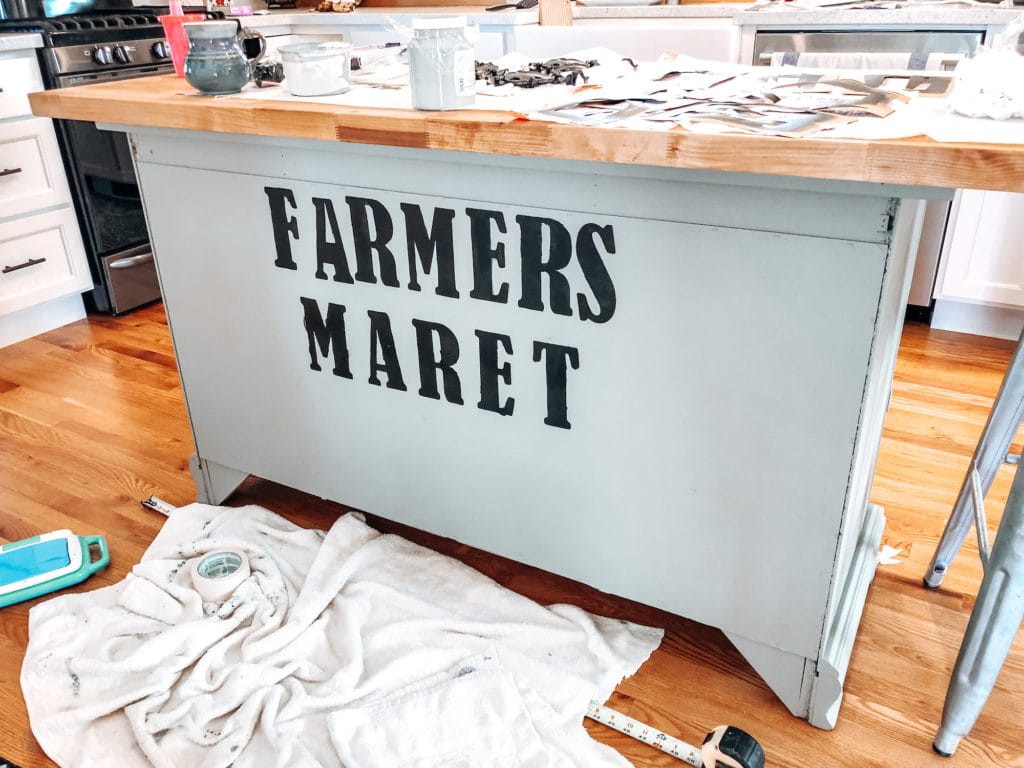
Our kitchen island is a re-purposed china cabinet. It was purchased from the local Restore for $75 many years ago. And until we moved into our home, I had no plans of painting it.

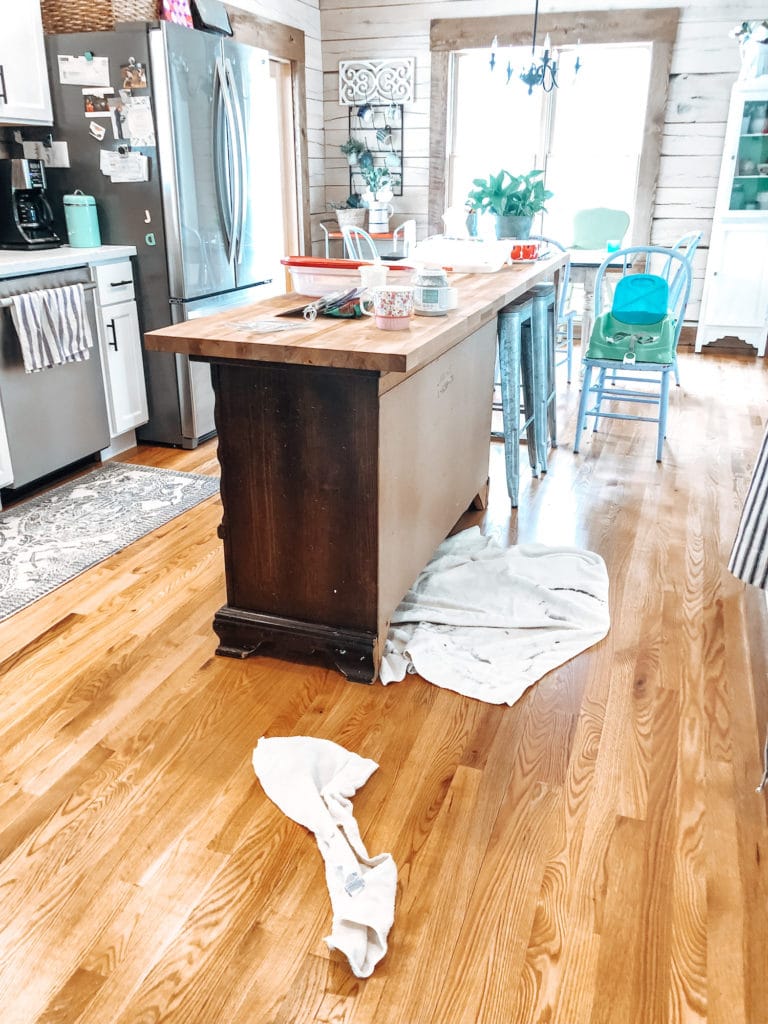
Just to note – we added the butcher block counter top to the base. This has given us more counter space.
Supplies
- Base Paint
- Stencil Paint
- Paint Brush
- Stencil Brush
- Mini Foam Roller
- Sand Paper
- Antique Wax
- Minwax Polycrylic – Matte
Painting
I started by removing the hardware (drawer pulls and handles) and cleaning with dish soap and water. The island base was cleaned with a mixture of hot water and cleaning solution, wiped it down and let it dry.

Drawer pulls and handles were painted with Fusion Mineral Paint – Coal Black. Before painting, I did try to use a Rub & Buff, but it did not stick to the metal. Three coats of paint on each drawer pull and handle and finished them off with two coats of Minwax Polycrylic.
Kitchen island was painted with Fusion Mineral Paint in Lichen in two good coats of paint. The paint went on very smoothly and had excellent coverage.
Stenciling
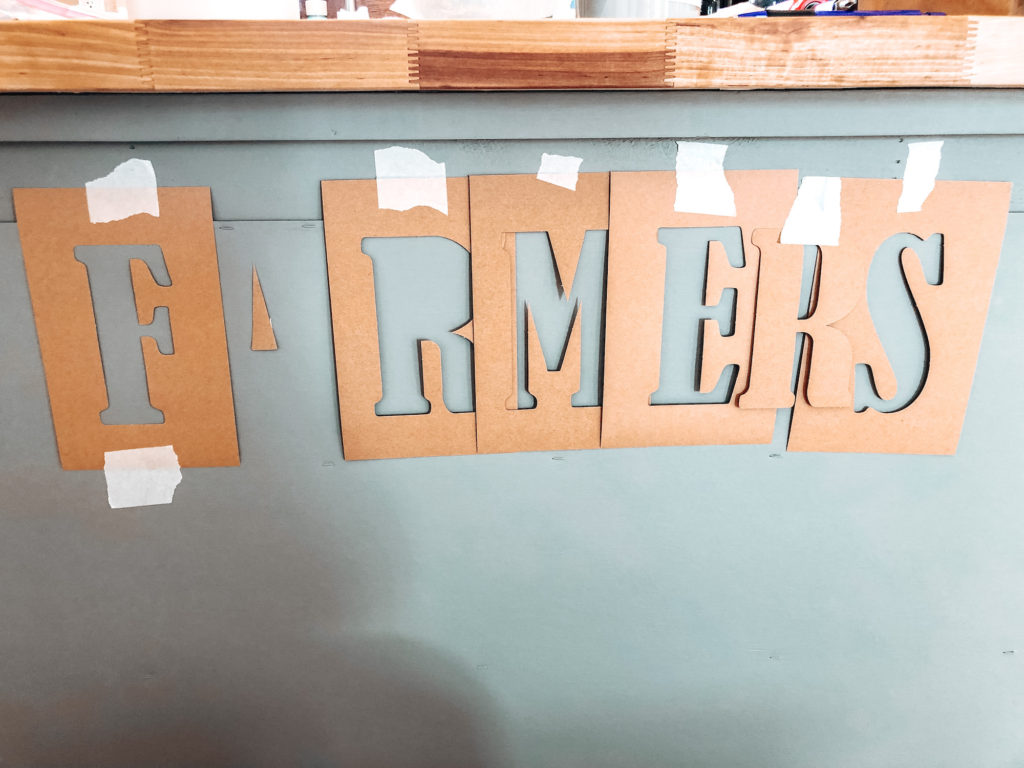
After the paint dried, I choose what stencil I wanted to use, and lined up the letters by using painters tape to hold them in place. After deciding the phrase and layout, I decided to use a mini roller for this project. I think that a stencil brush would have worked just as well. There may have been less bleeding with a stencil brush.


Finishing Touches
In order to fix the spelling mistakes, I had to paint over the second word and begin again. After fixing the spelling mistake, I sanded the corners and edges. I also sanded down the letters of the stenciled words to give it a worn look.
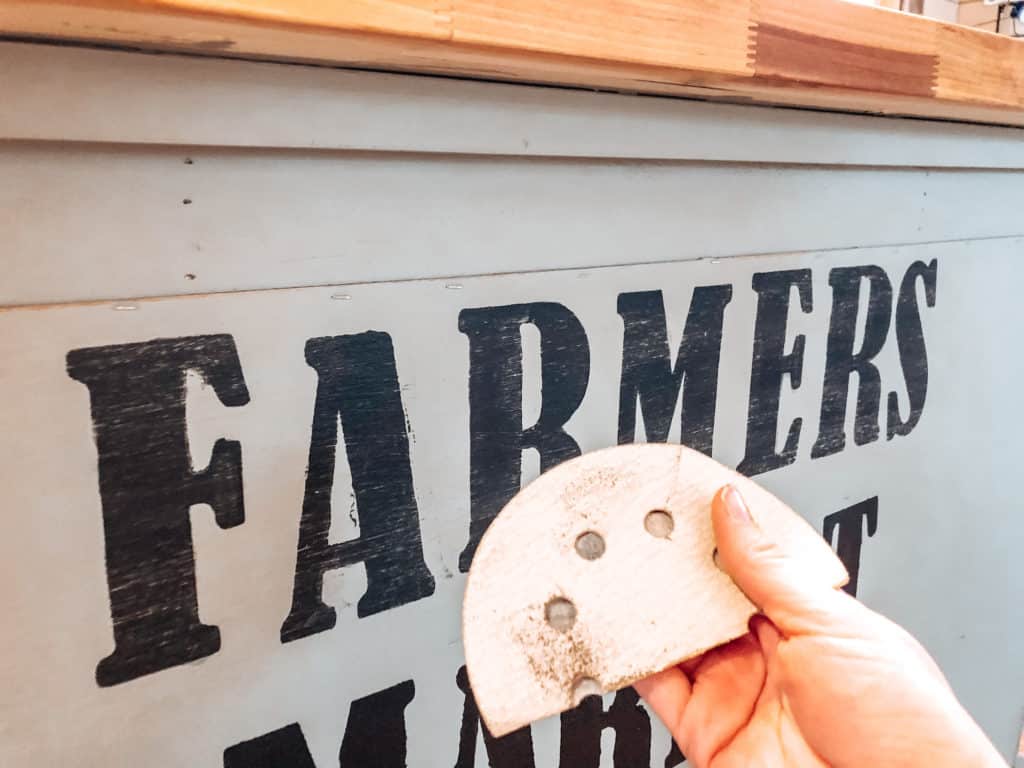
After sanding, I added antique wax to the grooves and edges. I brushed the wax on, and wiped off the excess with a damp cloth.
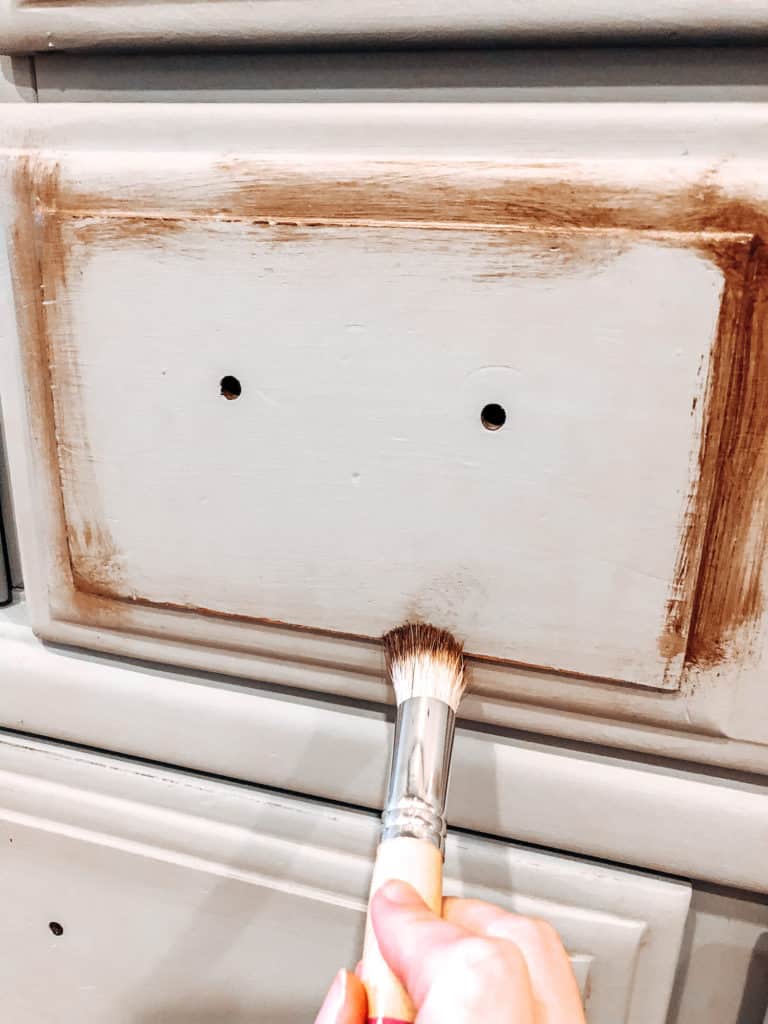
After applying the wax – which gave the piece an antiqued look, I put 2-3 coats of Minwax Polycrylic on the entire piece.

What I Would Have Done Differently
I would have used a piece of tape to keep the letters all even. Although, I wanted to have the look of a homemade painted sign, the OCD part of me wishes that the letters where even.
I love how the piece has transformed the look of the kitchen and gives it a subtle, yet pretty pop of color!
Links for Today’s Post
I may get a commission for qualifying purchases. You can see my full disclaimer for more details. Thank you for helping support Linen and Logs!
- 4 inch Letter Stencil – similar to what I used
- 1 inch Letter Stencil – similar to what I used
- Stencil brush
- Mini Foam Paint Roller
- Sand Paper – 120 Grit
- Antique Wax
- Minwax Polycrylic – Matte
Check out this post: Painting Furniture for Beginners
You can also check out Shop My Favorites Page to see all my favorite DIY and painting items!
Pin For Later!