Wood Christmas Tree
How to Make a Scrap Wood Christmas Tree
Disclosure: This is a sponsored post with Worx, but all opinions are my own.
This time every year, I start thinking about Christmas Decor. I start looking on Pinterest and Instagram and see all of these beautiful Christmas Trees, and while I have purchased a few of my own, I have always wanted something that is a little more unique to our home style!

And I love Christmas Trees as much as the next person! BUT… I don’t want my house to look like everyone else’s. Because who does?
So my mind starting reeling after seeing our scrap woodpiles, which we have a lot of. After building a log home ourselves, we have a lot of wood around here!
And the idea of making my own Rustic Wood Christmas Trees began to take shape!
As an Amazon Associate, I earn from qualifying purchases. You can see my full disclaimer for more details.
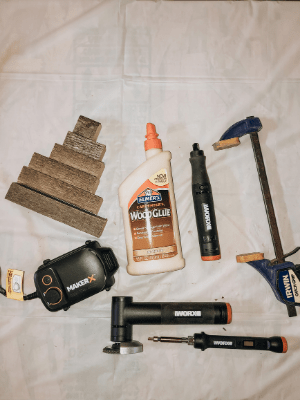
Supplies for Rustic Wood Christmas Tree
1×1 Wood Pieces (Cut to size)
Sand Paper
Prep Work for the Wood Christmas Trees
First, I went looking for the “perfect” scrap wood in the pile. This is wood that has been sitting outside for two+ years, and not exactly the prettiest wood.
But I grabbed the straightest, 1inch X 1 inch pieces that I could find. Are they perfect? Of course not! And they aren’t even all the same size! But, that doesn’t matter to me, because it just adds to the character of the project.
Next, I had my husband help me with cutting the boards into size. Mainly because I wasn’t interested in lifting the heavy saw to get into place…
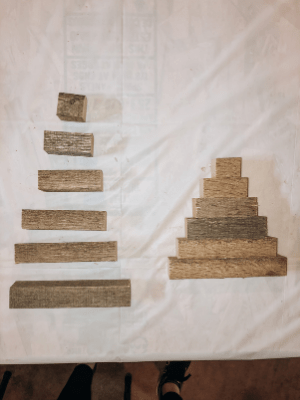
I had the 1X1 boards cut to these lengths:
6 inches
5 inches
4 inches
3 inches
2 inches
1 inch
Assembling the Wooden Christmas Trees
I laid out the pieces in the order in which they would be put together.
I then lightly sanded the wood where it would be glued. This step is not required, but because the wood was outside, I wanted to make sure there was no dirt on the wood before gluing together.
Using a thin line of wood glue, I attached the pieces of wood, starting at the bottom, with 6 inches, and ending at the top with 1 inch. I left about half of an inch on either side of the wood, so it makes a wooden Christmas tree.
I then used the wood clamps to hold the pieces of wood together while the wood glue dried.
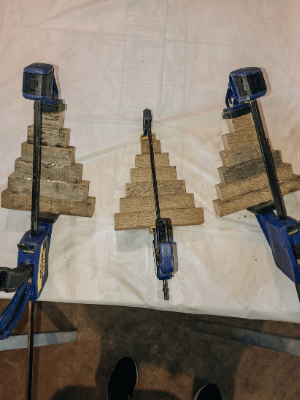
I do want to note, that I did not measure when placing the pieces of wood – I just eyeballed it to make sure it looked somewhat even.
Finishing the Rustic Christmas Trees
Using the MakerX Tools from Worx made making these wooden Christmas tree decor customizable, and easy to sand, and give a good finish.

First I used the MakerX – Angle Grinder with the sanding disc to sand the flat faces of the tree, front, and back. This tool worked perfectly for a quick sanding project!

Next, I used the MakerX – Rotary tool with the sanding disc to sand the short edges of each layer of the wood Christmas tree. This was the perfect tool to get into those tight spaces.

As the last step, I used the MakerX – Wood Burning tool to add a little holiday decoration. This tool was a little trickier for me, but with practice and precision, I was able to use it successfully. In the future, I will definitely use this tool again but on a different type of wood. The oak is very grainy and hard to maneuver the wood-burning tool.
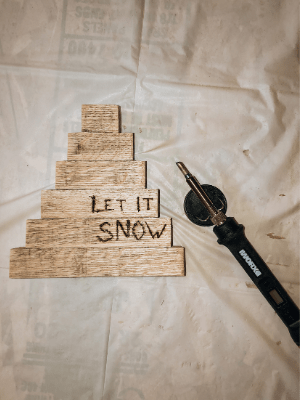
These rustic wooden Christmas trees are perfect for shelf decor and for adding in a rustic Christmas decoration for this season!


And a special thanks to Hometalk and Worx for working with me on this special project!
You can find this tutorial on Hometalk.