Class C Motorhome Renovation Reveal
I am sharing the final reveal for our 1998 Class C Motorhome Renovation. An easy, budget friendly motorhome makeover that anyone can accomplish!
This Class C Motorhome was our first step into motorhome traveling, and to say we were converted is an understatement! We love the convenience of traveling in a motorhome with a family and because this RV was only 26 feet long, it was the perfect one for me to learn how to drive!
When we purchased the Class C Motorhome, we had a few ideas on how to update the RV. But before any renovations were started, we used the motorhome for a few trips to see how we really liked it. And of course, we realized that we loved traveling in the motorhome (especially with a family)! But it definitely needed some updates.
This post contains affiliate links, which means I may get a commission at no extra cost to you. See my full disclaimer here.
Exterior Updates for Class C Motorhome
The first project that needed to be done, was replacing the roof of the motorhome. There was some leaking in the back corner and other spots that needed to be fixed. My husband did the research and replaced the wood and rubber for the roof.
This was a huge project in itself, but well worth the time! Also – you can look on youtube for any tutorials on how to replace an RV roof if you are needing that type of tutorial.
The second project we did on the exterior – was to replace the RV awning. This is a project that we have done before on previous campers, so it went relatively smoothly. Again, you can find a tutorial on how to do this on youtube.
Painting RV Motorhome the Easy Way
I painted the entire interior of the motorhome in two colors – Simple White by Benjamin Moore for the walls and ceiling and Vintage Pewter by Benjamin Moore for the cabinets.

You can see the whole painting process in this BLOG POST HERE.
In the bedroom area, I used a side of a sponge and did a sponge wall design all the way around the room. I did not measure my spacings (although I probably should have) but it turned out looking pretty good! And I liked how it was extremely budget-friendly and literally took about 15 minutes to do.
Budget Friendly Cabinet Updates
The cabinet fronts were a little difficult to update. Because the cabinet fronts had some cracked etched glass on them, I had to figure out a way to cover them versus just painting. I ended up using a bamboo table runner and was very happy with the result – You can see the full BLOG POST HERE.
New Flooring in RV
Before we even decided to reno the motorhome, I knew we needed to remove the carpet and put something that could be swept and easily cleaned. We purchased this flooring and my husband was able to install it with no issues.
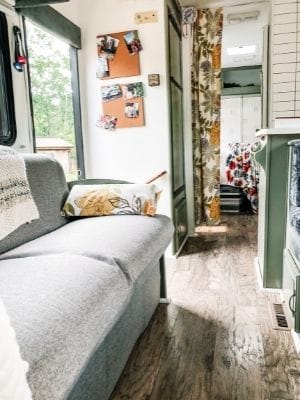
We were very happy with how it turned out, and it was so much easier to keep clean while camping – especially with sand and the kids coming in and out all day long.
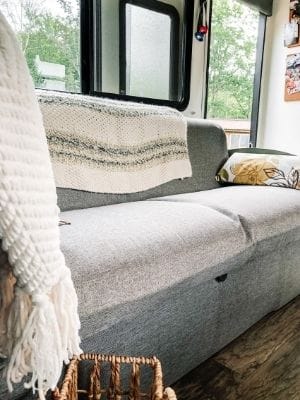
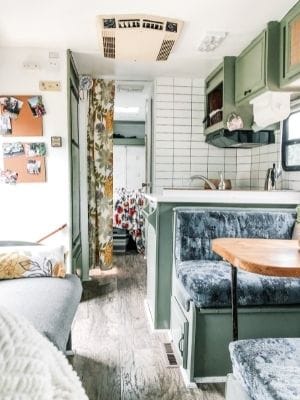
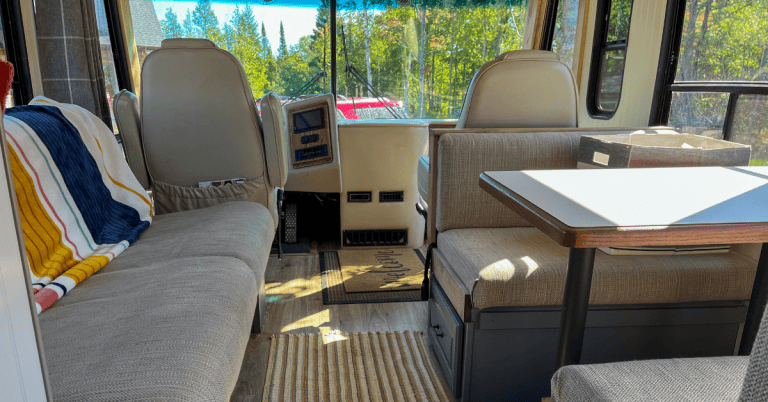
Reupholstered RV Couch
Recovering the Motorhome couch was a project in itself! We knew that we could not replace it, because of the seatbelt’s accessibility and needing the sleeping space. So I figured out a way to recover it, without pulling it all apart. You can see the full BLOG POST HERE on how I recovered the RV couch with fabric and hot glue!

Painting Fabric in the Motorhome
There was a lot of blue in the motorhome. And while I tried to cover most of it, there were just some that we didn’t know how to cover. So I ended up painting with a chalk paint + water mixture. I did about 1/2 paint and 1/2 water mixed.
Using a spray bottle, I sprayed the fabric to get it wet and then painted the mixture on. It covered really well and worked great for the small areas that I painted.
I do want to note – that I would probably not use this method on a large piece of furniture, as it can look really splotchy and kind of get a crusty feeling (in my opinion).
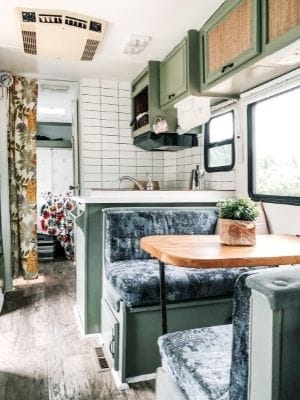
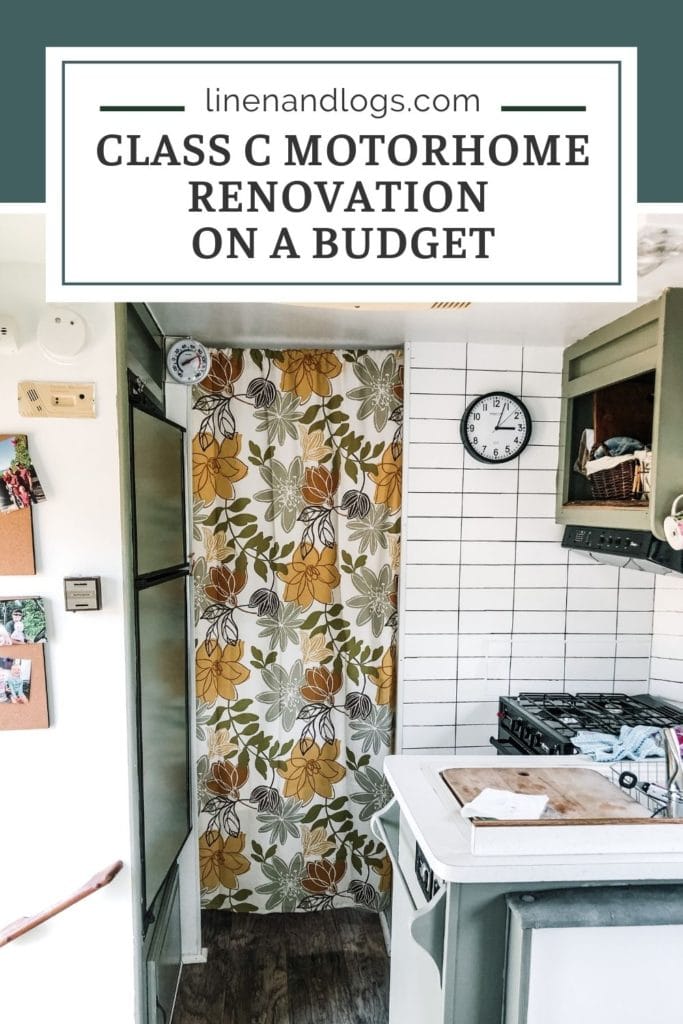
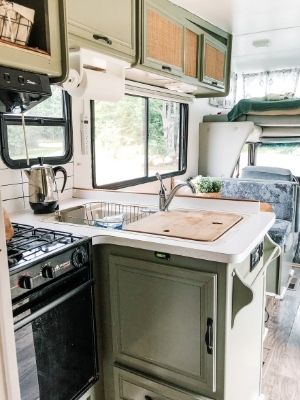
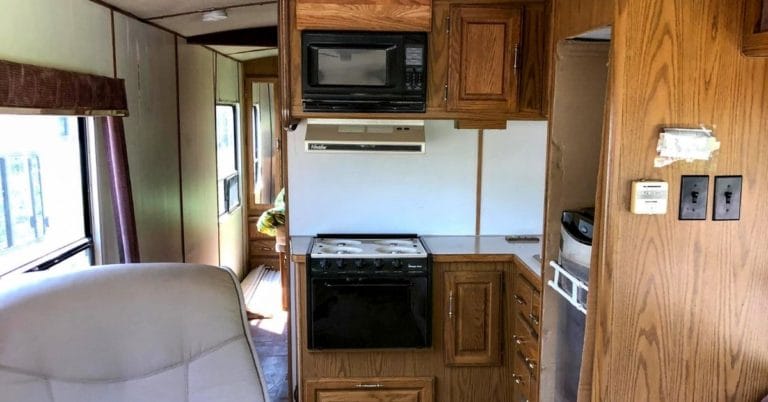
Motorhome Kitchen Remodel
The RV Kitchenette is one of the most used areas of our motorhome (as is most kitchens, I am sure!) And so I wanted to make it cute and functional!
After painting the cabinets, we decided to remove the microwave. By removing the microwave (which we never used except for the looking at the time) we were able to add a nice storage area for easy access. This was a huge game-changer! I had access to our most used items like paper plates and plasticware.
We updated the kitchen sink faucet because the old one was leaking. I think changing out the faucet in an RV is such an easy way to update the look of the kitchen and the faucets in the older RVs (like ours) can be extremely cheaply made!
I also did a sharpie tile backsplash in the kitchen area. Using the ruler and pencil I drew out my desired size of the tile (3×5) and then followed with the paint sharpie and ruler. I also needed to use some paint to touch up some areas that didn’t come as clean as I would have hoped. But overall I was really happy with how it turned out!
Supplies Used for Sharpie Tile:
- Ruler
- Pencil
- Paint Sharpie
RV Bathroom Updates
The motorhome bathroom got the same paint and flooring as the rest of the motorhome. This space was more of an afterthought and while I was happy with how it turned out after the stenciling on the walls, I kind of wish I would have done something a little different.
In the bathroom, I used THIS STENCIL HERE and cut a flower out. I then randomly stenciled flowers around the bathroom to give it some visual interest.

Motorhome Bedroom Remodel
The bedroom area is located in the back of the motorhome. When we purchased the RV, it had two ‘twin’ mattresses with a large cabinet in the middle. Besides the fact that the foam mattresses were horrible to sleep on, the setup itself just did not work well for our family.
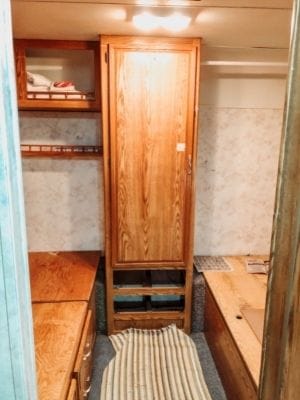
We decided to remove the mattresses and cabinet and did a little reconfiguration. We did not actually remove the twin supports area but just added plywood over the two sections to make a platform. Under the two twin beds were the generator and furnace, and removing those would have been a lot more labor-intensive than was needed.
The wood from the old cabinet was repurposed to make a shelf on the back wall for increased storage space.
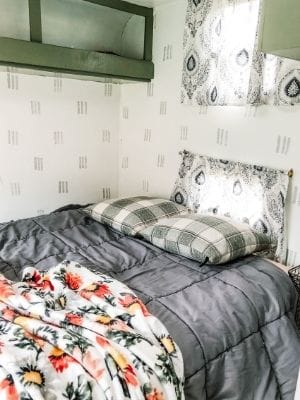
The platform area was large enough to add a queen mattress and have extra room at the foot of the bed for bin storage for clothes.
While this setup was still not ideal, it worked for the space that we had. And it was relatively very budget-neutral as we used plywood that we already had in order to make the platform.
Class C Motorhome Reno Sources
- Paint Colors – Walls and Ceiling (BM – Simply White), Cabinets (BM – Antique Pewter), Gray Sponge & Stencil (Clark & Kensington – Garden Stone)
- Kitchen Faucet
- Flooring – Traffic Master Saratoga Hickory Amber
- Window Blinds
- Cork Board for Pictures
- Command Hooks
- Black Paint Sharpie
- Sponge for Sponge Wall
So my question for you, would you remodel your RV? This particular rv reno was very budget-friendly and we loved how it turned out.
You May Also Like


So fun to see the before and after. Hope you get lots of enjoyment out of it this summer.
Thank you so much! We sold this motorhome last summer, but we are looking forward to finishing our new (old) one!