Class A Motorhome Remodel Reveal
This Class A Motorhome Reveal is such a long time coming (like years!) We did this project a couple of years ago on a 1992 Sun Voyager Gulfstream Class A RV Motorhome. We have since sold this RV, for multiple reasons – the biggest one being that we had another baby, and having four kids in a motorhome was not quite ideal. But since selling our motorhome, there have been multiple times while traveling that we wish we would still have one. And, it is so nice to grab snacks, take a quick bathroom break, and let the kids out (while stopped!) without ever having to use public restrooms.
First, check out the BEFORE BLOG POST that I did about the Class A Motorhome. This thing needed a major overhaul. There was mold and water damage, missing appliances, and massive cabinets with teeny tiny drawers (that this mom doesn’t have time to open and close!).
Planning a motorhome renovation is both exciting and a little daunting. (Much less daunting than planning a house!) And so I wanted to have a little fun with one.
All the products will be linked at the end of the blog post. This helps keep the post streamlined while reading. Thank you for checking out our project!

As an Amazon Associate, I earn from qualifying purchases. You can see my full disclaimer for more details.
RV Renovation Main Cabin Space
The main RV Cabin space includes the driver and passenger seats, the couch, and the dining table. This particular motorhome did not have typical table and bench seats, and we added those to include more seating and sleeping space.
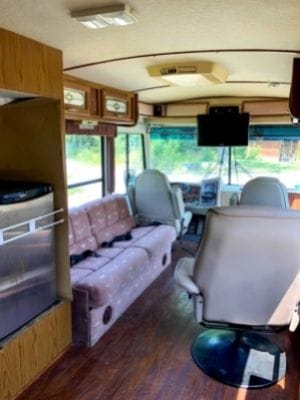
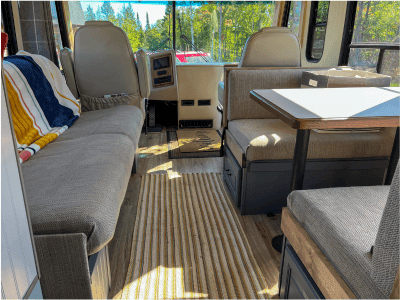
For this particular RV renovation project, we were able to purchase another camper for $500 and used many parts to upgrade the motorhome. This included the table dinette, refrigerator and stove, and other odds and ends. This was a huge upgrade to what was missing when we purchased the RV. While this may not be realistic for everyone, it allowed us to change out some much-needed parts for a fraction of the cost it would have taken.
One thing we have learned while doing projects on a budget, you have to think outside the box. For this project, that meant purchasing another camper (with exterior damage) for cheap to get what we needed, and we were then able to take what we wanted and then put it back on Facebook Marketplace for free and someone came it got it for their project!
The table and benches were removed from two separate campers and we were able to salvage. We had to cut both down to size to allow a nice walking area, but overall it was worth it to add the extra sleeping area. We also added seatbelts to allow for safe traveling and the kids loved being able to use the table when on the road.

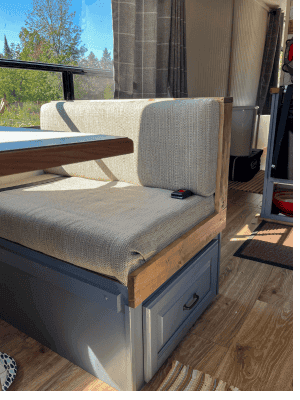
The RV couch was that lovely pink fabric, and we recovered it using the upholstery fabric I purchased online (small-town living). You can check out different types of UPHOLSTERY FABRIC HERE. I would definitely recommend using upholstery fabric, it is just such a better quality fabric and can withstand the abuse that furniture can take.
We used the same tutorial that I did on our last Motorhome Reno, along with using zip-ties to hold the fabric in place. The setup on this jack-knife sofa was just a little different, so we were able to change our approach this time around. Both are great options – using zip-ties or hot glue, it just really depends on the setup of your sofa couch. HERE IS THE TUTORIAL I DID ON RECOVERING RV COUCH.

The RV motorhome required a lot of upgrades in lighting, headlights, engine work, and so many other little projects – that is probably a normal DIYer is probably not going to take on. (Yes, we are not normal 😆, did you see the before pictures!!) And yes, we did all the work ourselves.
There was also staining (or mold spots) on the ceiling of the motorhome that needed to be cleaned. And, while it was not an easy project cleaning above my head, THIS CARPET CLEANER worked like a charm! Highly recommend! And it works very well on regular carpet too.
Using full sheets of paneling, we recovered all of the walls and used trim pieces between each sheet. We painted the walls Benjamin Moore Pale Oak in a satin finish. This color was the perfect neutral that did not leave the walls a stark white (a look I was not going for!).
Motorhome Cockpit Updates
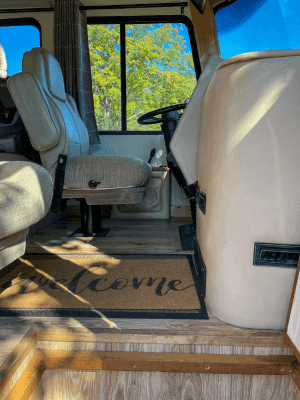
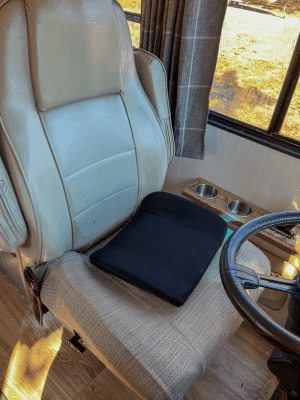
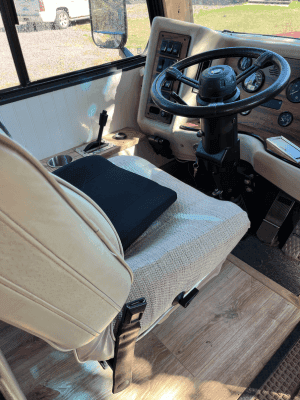
The driver’s and passenger seating areas (apparently it is called the cockpit! I did not know this) were very custom to this Class A Motorhome Renovation. We used scrap pieces of oak boards to build custom cup holders, and the staging board for the radio/ camera; removed the seats, and recovered (following the same tutorial as the RV couch).
And the whole area was rewired by my husband. He loves tinkering and figuring out things, and this was done by him 100%. (I provided moral support 😂).
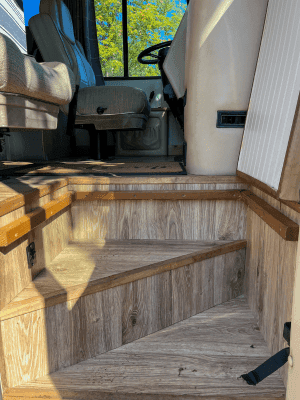
Because this motorhome had a door near the passenger seat, we also had to remake the platform to cover the steps when a passenger was sitting in the seat. We used the same flooring on one side, and paneling on the underside so it looked like the wall when not in use.
Motorhome Kitchen Reveal
The kitchen area in the motorhome was an area that I wanted to make sure that I added color. I painted the cabinets a fun blue/gray, Benjamin Moore – Eclipse in satin cabinet paint. It was a fun pop of color in the small space.
For the backsplash, I wanted a fun pattern. I decided to try using Floor Pop Tiles, and while it looks great from afar, I was not happy with how it turned out. I used a muscle-bound sticky backing and then placed the floor pop tiles. We still had to nail the corners of the tiles down, and I would not recommend using a sticky tile for a backsplash in an RV. While it looked great from afar, I was not happy with the overall look of the backsplash project.
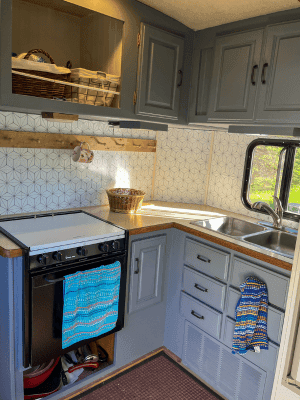

We ended up placing a 1×4 board with peg hooks across the backsplash to help hold them in place (while also adding more hanging storage in the Motorhome kitchen area).
The lack of a refrigerator when we purchased the motorhome was something that we knew we had to replace. We ended up using the refrigerator from the camper that we bought. We took the RV fridge and stove and put them in the Motorhome. This was a huge upgrade for both appliances for a fraction of the cost it would have been to buy new.
RV Bathroom Renovation Reveal
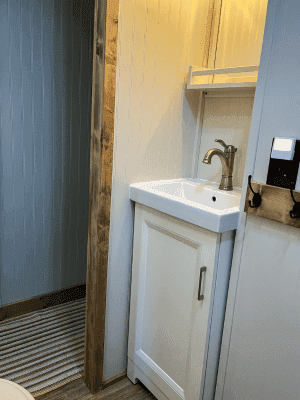
The RV bathroom remodel was completely the one space in the motorhome that we gutted and remodeled completely. While we did not intend to do this a first, it became apparent that it needed to be done as the project progressed. My husband rerouted the plumbing to move the sink, but we kept the shower and toilet in the same spots.
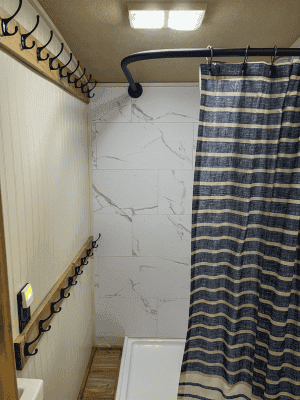
We had to replace the shower, so we purchased the smallest shower base that we could find at Menards and prepped the area the same way you would prep the area in a bathroom in the home. We used cement board and painted RedGaurd Waterproofing (left over from when we built our house) before installing the shower base. My husband had to build up the base of the shower to allow room for the drainage pipes. This caused the shower to be a little shorter than anticipated, but it worked just fine for our needs.
We then used interlocking waterproof tiles for the shower walls. This part of the project was a little more expensive, but we loved how it turned out. We also used the shower on multiple trips, and it was so nice, especially for the babies! I found a shower head that had an easy on/off switch and with the large water tank on the motorhome, we were able to take multiple showers.
Finding a small sink and vanity was a little difficult, but we found what we needed at Menards and customized the space to fit the 18-inch vanity. And because hooks are an absolute must, we added double rows of hooks and lots of them in the bathroom. These came in handy for wet suits, towels, jackets, and whatever else needed a spot during travel. I miss these hooks the most 😂

Motorhome RV Bedroom
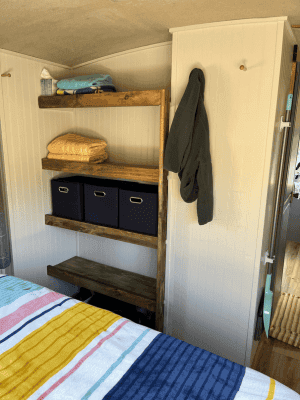
The main bedroom was set up very nicely – except for a massive cabinet with about 10 mini drawers. When I told my husband that it was coming out, he looked at me like I was crazy 😂. And so I took the drill and hammer and started tearing out the massive cabinet. It was very satisfying to destroy something! (We don’t get many opportunities to do so, and I took advantage of that).
We built open shelves instead of the cabinet, and it was a great option for easy access and storage. And when we sold this Motorhome RV, the new owners loved the open shelf storage option too! Win-Win for us!

Links for Motorhome Remodel
- Linen and Logs Amazon Store – All Links to products we purchased are here
- Upholstery Fabric
- 34×34 inch Shower Base
- 18-inch Bathroom Sink and Vanity

